Cucumbers by the Dozen from your Own Garden

Growing cucumbersWhat could be nicer than a basket full of young green cucumbers fresh from the garden?  Well that is exactly what I had from my garden this summer.

And only from 6 cucumber seeds!

For some reason, we had been buying those long tunnel-grown cucumbers and it had been ages since I’d planted any of my own.

So early this summer I decided to give it a go. I chose a north-facing spot along the fence of my vegetable garden because I prefer cucumbers to climb.

Cucumbers that lie on the ground are liable to be eaten by insects.  And in any case, they always have a white underbelly where they have been in contact with the ground.

So I prepared the soil with lots of home grown compost. And then I bought a packet of cucumber seed and planted about 18 seeds.

It wasn’t a big patch as I reckoned we only needed one or two cucumbers a day.

In a few days the seedlings sprouted.  And once they were well established I thinned them out to only six plants at about 50 cm apart. Read more

Easy Pumpkin Fritters. A Quick and Delicious Recipe

Here  is my pumpkin fritter recipe. These fritters are easy to make and they really are delicious – especially when you have grown the pumpkins in  your own garden!

The fritters always turn out puffy and golden brown.

My Easy Pumpkin Fritters

2 cups boiled and mashed pumpkin (500gm)
½ cup flour (125gm)
2 level teaspoons baking powder,
Pinch of salt
1 beaten egg
A little milk if the consistency is too tight.Pumpkin fritters

Mix well and drop with a tablespoon into hot oil. Lightly brown both sides.
Drain on absorbent paper and serve hot with cinnamon and sugar. Read more

How to Grow Pumpkins the Easy Way

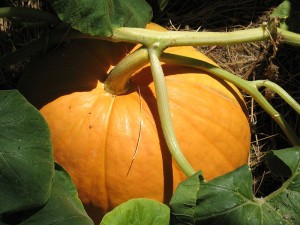
PumpkinPumpkins are surprisingly easy to grow. I proved it and I’ll tell you how it all happened.

I kept a few pumpkin seeds from a really good pumpkin we had bought at the supermarket.  I knew that pumpkin vines needed a lot of space. So I planted just 6 seeds at the bottom of my garden.

Our garden slopes towards the bottom boundary so they were well out of sight and I forgot about them until a few weeks later when I saw some big healthy pumpkin leaves.

It didn’t take long before yellow pumpkin flowers started to develop and soon one plant in particular began to trail down the slope bearing lots of little white pumpkins. Read more

How to Pick Spinach without Spoiling the Whole Plant

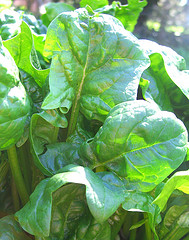
A healthy row or two of green spinach growing in your garden is truly a lovely sight.  Spinach is so quick and easy to grow that I often wonder why people don’t try to grow this health-giving vegetable more often.


I realize that not everyone loves spinach but there are some spinach recipes that could make even the greatest spinach despiser change her mind.

Spinach

Photo:Mary Mactavish

Now as for picking spinach – there is a secret that not everyone knows.  Dedicated gardeners will know how – but there are some cooks who will advance on their kitchen gardens – huge carving knife in hand just waiting to decapitate whole plants without giving a thought to how they will regenerate.

Always remember – you don’t want your spinach plants to cringe and cower when they see you!

If you pick spinach carefully, the plants can go on growing the whole season and provide you with their nutritious green leaves for months to come.

How to Pick Spinach

The correct way to pick spinach is by removing only one or two healthy outer leaves from each plant.

By the time you have gone down the row you will have gathered a bunch full of fresh green spinach leaves.

In this way the spinach plant won’t even notice that it has been trimmed and it will continue to grow and produce fresh new leaves from the centre.

Here is an easy quick creamed spinach recipe that I’m sure you will enjoy.


My Climbing Beans are too Smart to be Fooled

Last year, I had a bumper crop of climbing beans.  I picked baskets full of delicious stringless beans every two or three days.  Climbing BeansI had so many beans that I gave them away to family and friends and truly didn’t know what to do with them, they came up so fast.

And all this from a patch of a dozen or so magic climbing beans. It was a roaring success!

Now this year, I didn’t want to grow my beans in the same place so I prepared a new bed in another part of the garden.

Ready Made Fence

There was a ready made fence for the beans to climb on so I thought it was ideal. Then I sat back and waited.

But what a disaster! My beans plants were so straggly that I couldn’t bear to look at them.

All the leaves were reduced to a web of lace by an invasion of some nasty leaf eating insects.  And obviously the yield was very poor. The new garden was a total failure. I had thought I could pull one over on the beans.  But clearly I couldn’t.  They knew better. My climbing beans were too smart to be fooled.

Last Year’s Beans Were in Full Sun

Well, I know exactly why this happened. I had planted the beans too close to a group of trees and they clearly did not get enough sun – whereas last year’s beans were in full sun. Also, the soil was not as rich as the soil in the first bed.

In my defence, I had run out of compost. But I learned the hard way that beans are not to be fooled. Do what they want and they can be charming and obliging. But try to bluff them and they simply go on strike.

Anyway, having learned my lesson I started all over again and went back to preparing the original bed in full sun where I had previously had so much success.

I carefully composted the bed till the soil was dark and friable. I put up a fence for the beans to climb on. And then I planted exactly 20 beans.  Talk about Jack and the beanstalk!  My hopes were high.

Now I don’t want to talk too soon – let’s just say that my beans shot up tall and healthy in record time. At present they are climbing all over the supporting fence and the leaves are big and healthy.  I am now waiting for the first flush of flowers.

I’ll report on any new developments as to the  progress of my organic beans in due course.
Technorati Profile